With the recent release of Premiere Pro 2022, Adobe has changed the process of creating a new project. See below for a step-by-step tutorial on this process:
Watch Video Tutorial
You can watch the video here, or scroll down for written instructions.
1. Create a New Project
- Start Premiere Pro
- Choose File > New > Project from the top menu or click on the New Project button on the welcome screen.
- This will bring up the new project dialog box:
2. Create Project File
- Now bring your attention to the two fields at the top of the screen
- In the Project name box type a descriptive file name for your project file
- Then click inside the Project location box and then Choose Location
- This will open a file browser and you can navigate to your project folder or a convenient location such as your Desktop or Documents folder.
- This file is where all of your work will be saved so make sure to give it a descriptive name and save it to logical location so you can find it later on.
3. Import Media
- Now you can import the media that you’ll be editing.
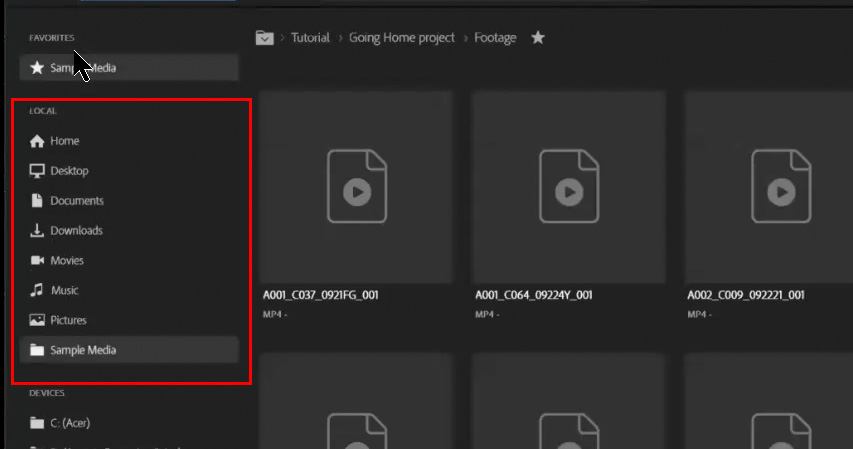
- On the left side of the screen, click on the location where your media is located. This could be your Desktop, Downloads folder, or some other location.
- Once you have located the folder where your media files are located, click on a single file to select it.
- To select multiple files or all the files in a folder, click on the first file then Shift-click on the last file. Now all of the files in the range should be selected.
4. Turn Off Sequence Option
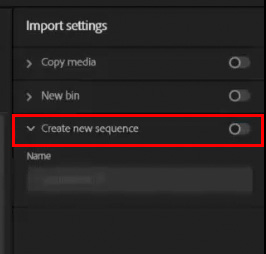
- On the right side of the screen look in the Import settings section
- Be sure the option for Create new sequence is turned off. (It should appear gray. If it’s blue, then click it to turn it off):
- When this option is turned on all of your media will be added to the Timeline, which we don’t want right now.
5. Confirm
- Finally, click on the Create button in the lower right corner and your project will be created.
- Your media will be in the Project panel and you can start editing.


